Woodworking Furniture | An Old Carpenter Teaches You How to DIY a Natural Edge Solid Wood Table in 7 Steps! (Super Detailed)
Original by Uncle Wood, Woodworker’s Workshop
Essential furniture for beginners among woodworking enthusiasts, wood crafts, handiwork, tutorial
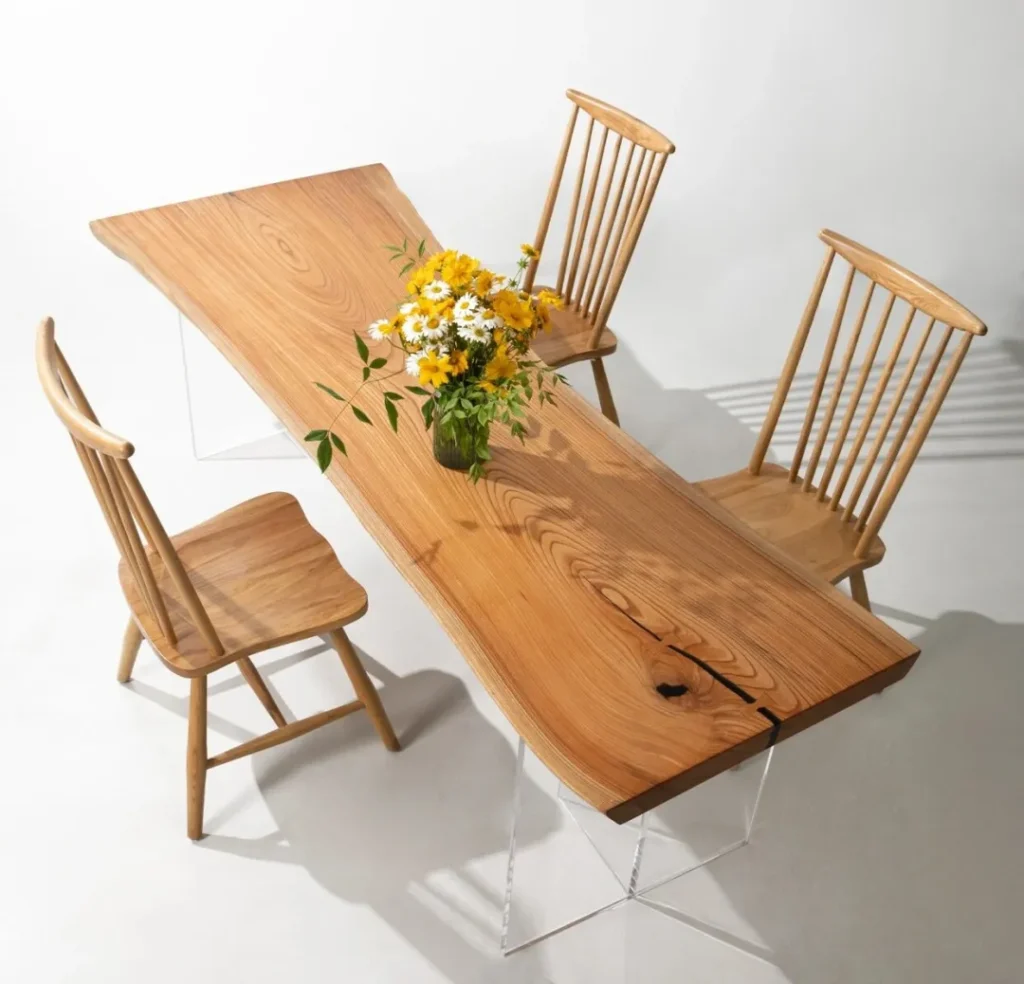
Dear woodworking friends, hello! In this issue, Uncle Wood will share with you how to make a natural edge solid wood table and how to reduce the cracking and deformation of solid wood.
During this process, we will share some practical tips and know-how to let you understand the process from wood to the wood table, so that you have a better concept when you start.Photo @ DAJIAO WOOD
First, let’s talk about the production process suitable for beginners:
1. Customize a tabletop that fits the size of your home space.
2. Customize a set of table legs. You can purchase them through customization throughout this process.
Next, the production process suitable for woodworking friends with carpentry skills:
1. Select the log/rough board you like: The water here is the deepest. You need to understand the origin and characteristics of various woods. Consider the appearance, properties, color texture, and defects of the wood, and then choose the one you like within your budget.
2. Sawing the wood: Logs must be cut into boards to make furniture. Considering costs, the thickness of the cut boards in the lumber market is mostly 3 – 5 cm. The thinner the cut, the more boards can be cut from one log, which is called the yield rate. In fact, the thickness of the tabletop should be designed according to the size. The larger and longer the board, in order to make it more stable and less likely to deform or crack, it is more solid and stable to be thicker. The thinner the board, the higher the requirement for the process.
3. Drying the boards: Most woods cannot be used directly right after sawing. They must be dried. After the wood is dried, its stability will be greatly improved. Since a lot of moisture is removed, it is easier to process. Dried wood is also less likely to rot. The strength of the dried wood will be greatly enhanced.
4. Selecting and processing the boards: The first step is to select the appropriate material. Use a round chisel to remove the bark and retain the natural edge. The second step is to use a soft brush and a rag to remove any excess dirt or debris on the surface. After the surface is cleaned, sand the edges with sandpaper or a sander to eliminate any rough spots on the board. Then make mortise and tenon joints on the boards, apply glue, and assemble them. Finally, use epoxy resin or butterfly tenons to repair and beautify the cracks and holes in the wood. A tree that has grown for a hundred years will leave many unique textures, knots, cracks, damages, and irregular natural edges. How to turn these “imperfections” into “beauty” is what you need to consider.
5. Sanding the tabletop: Select sandpapers of different fineness. Start with 80-grit sandpaper and gradually increase to 220-grit sandpaper. Sand it by hand again and again until it feels smooth.
6. Painting: Currently, the popular painting methods in the market are water-based wood paint and wood wax oil painting. Water-based paint combines texture, protection, and environmental friendliness. Wood wax oil combines texture and environmental friendliness, but its protection for the board surface is slightly weaker. The entire painting process involves multiple sanding and painting techniques superimposed. The purpose is to make the board surface more durable, smooth, and textured.
7. Customize the table legs, and a unique work belonging to you will emerge. The above is the production process of the wooden table shared by Uncle Wood in this issue. I hope it will be helpful to everyone. If you have any questions or want to know more about home production knowledge and drawing tutorials, feel free to send a private message in the background! If you find it useful, click “Read” at the end of the article. Recommended readings: Woodworking Navigation | Some Nice Foreign Woodworking Websites Woodworking Handicrafts | DIY Handmade Black Walnut Plate Wooden Furniture | Production Tutorial of Flower Stand (Tea Table) The Graceful Beauty of Wood Grain Woodworking Introduction | A Simple Handmade Tutorial for a Wooden Cutting Board Woodworking Handicrafts | DIY Handmade Resin Wood Pendant Production Tutorial Woodworking Handicrafts | Wood Ring Making Tutorial A Log Record for Love Woodworking Knowledge | How to Quickly Memorize and Identify Wood Grain and Timber? Woodworking Handicrafts | Production Tutorial of Wooden Antler Necklace Woodworking Talk | This Wood Workshop with 34 People Only Recruits Simple-minded Apprentices but Earns 1.1 Billion Annually! Woodworking Handicrafts | Production Tutorial of Wooden Spoon for Tableware “Ingenuity creates beauty in life.”