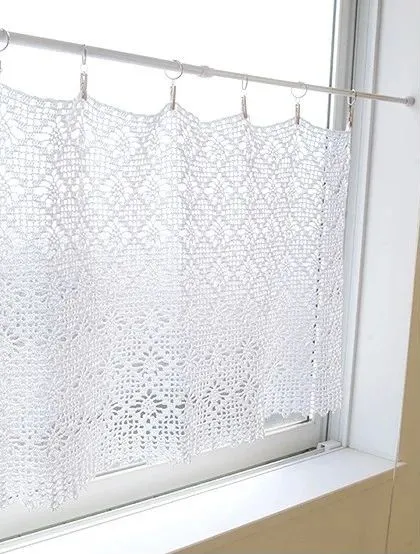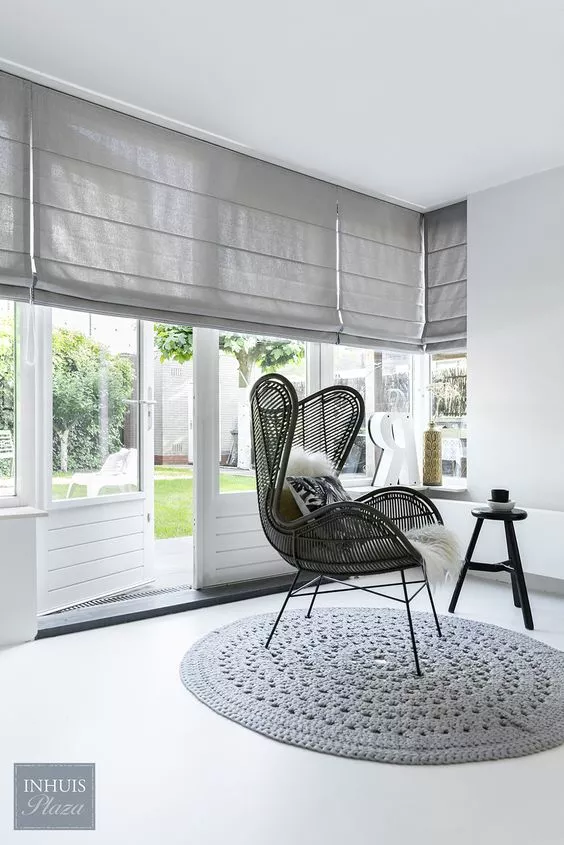
Roman shades are a type of window treatment that involves threading a rod through the fabric, giving it a stiff and textured appearance, fully showcasing the material’s quality. Compared to roller shades that operate similarly, Roman shades offer more depth and decorative effect, being luxurious and beautiful, adding an elegant and antique beauty to windows. Today, we focus on several methods for making Roman shades by hand. Let’s start crafting together!
Method One: Standard Roman Shades
1. Cut a piece of wood equal in length to the window to fit the top of the window opening internally, then secure it to the window frame with screws.
2. Select fabric and lining materials. Avoid lightweight fabrics and opt for those with good light-blocking properties.
3. Cut the fabric. Add an inch (2.54 cm) to both the height and width to accommodate the window size. The excess fabric cut off can be used for seams, and the outer layer of fabric should be slightly longer to allow for hemming around the edges.
4. Attach the two layers together. When attaching, sew fabric tape to the lining fabric to create a channel for the wood rod, instead of using adhesive.
5. Sew around the perimeter. Trim the seam allowances at the corners diagonally, and if the outer fabric is wider, leave a margin on the back, sew the sides together, fold the bottom edge by hand, and iron it flat.
6. Turn the fabric right side out and iron it flat. Be careful to cover the lining fabric at the front edge during ironing to prevent the lining from showing.
7. Close the opening with slip stitch. Sew a strip of Velcro at the top edge of the material, then use it to attach the fabric to the wood.
8. Measure and mark horizontal lines. Mark where the horizontal folds or creases will be. Glue thin wooden strips horizontally along the crease lines.
9. Wait for the glue to dry. This will take approximately 20 minutes.
10. Sew plastic rings onto the wood strip. Space them evenly along at least two vertical lines, ensuring the rings are securely fastened to the wood strip.
11. Measure and cut two lengths of pull cord. They should be twice the height of the window. Securely tie the cords to the bottom rings on each vertical line.
12. Attach the top of the fabric to the window frame strip. Use Velcro or staples to secure it.
13. Thread the pull cord through the rings. Keep the fabric flat and thread all the cords through the top screw holes to move them all to one side for raising and lowering. Tie the cords together beyond the last screw eye, allowing control over the opening and closing of the shade.
Method 2:(Spare Roman Blind)
1. Measure and cut the fabric. It is recommended to use a measuring tape and fabric scissors. Measure the window to determine the height and width required for the Roman blind. Generally, add 5 cm to the width. 2. Select the fabric and lining material. Avoid choosing lightweight fabrics and opt for those with better light-blocking properties. 3. Mark the positions of the dowels. Mark a dowel every 5 cm starting from the top. The horizontal distance between them should be between 20 cm and 30 cm, and the size of the bottom should be half of the rest. 4. Create the dowel pockets. Cut strips of the Roman blind lining that are 8 cm wide. Then, bring the right sides together, fold them in half along the length, and sew a 1-cm seam. 5. Sew on the dowels. Fix and sew the pockets along the marked lines in the center. Sew through all fabric layers and make the lines on the front of the Roman blind as inconspicuous as possible. Insert the dowels into each pocket, then slide the stitches and turn them under the original edge. 6. Sew on the grommets. Sew a grommet at the end of each pocket, 2 cm from the fabric edge. Sew another grommet at regular intervals between 20 cm and 40 cm along the width. 7. Stick on the hook strip of the Velcro. Fix the slat in place and then stick the hook strip of the Velcro to the front. 8. Attach to the slat. Fix and sew the top of the Roman blind. Fix and sew the loop strip of the Velcro at the top of the Roman blind and then connect it to the slat. Screw the eyelets into the bottom of the slat to align with the loops on the Roman blind, and add an extra eyelet on the side from which the drawstring will be pulled. 9. Tie the drawstring. Fix the cord to each bottom loop and then thread it up through the eyelets on the slat. Thread all the drawstrings through the extra eyelet and fix them on one side of the Roman blind. Install anti-slip nails for fixing when the Roman blind is pulled up. Method 3: (Fixed Roman Blind) 1. Measure the window. Measure both the width and length. Since this is a fixed Roman blind, predict the light-blocking area and degree during the measurement. 2. Cut the fabric. Cut a piece that is 2 inches wider than the window. The cut area should be 2/3 longer than the light-blocking area. For example, if you want to cover 18 inches (46 cm), cut 30 inches (76 cm). 3. Sew the fabric. The sewing width on each side should be 1 inch. Generally, use iron-on no-sew tape instead of needles and thread. 4. Cut a piece of scrap wood. The length of the wood should match the width of the Roman blind, and the width is 2 inches.5. Drill three holes in the wood. This reduces the need for a curtain rod. The drilled holes should match the size of the screws.
6. Decorate the two ends of the wood. When viewed from the side, the wood may affect the visual effect. You can use glue or colored tape to stick the excess fabric to the two ends of the wood, or paint it with colored paint, or inlay ornaments such as pearls for decoration. 7. Fix the fabric. Use colored tape or glue to fix the fabric on the wood. 8. Create fabric folds. Fold the fabric to form pleats, and the size can be determined according to your needs. The standard spacing is about 5 inches. Use a ruler if necessary. 9. Fix the grommets. Make sure to operate from the back of the fabric so that the grommets are not visible. Place three grommets in each pleat. 10. Hang the Roman blind. Lift the fabric and use the three pre-drilled holes to fix the wood to the wall. The fabric should hang in the front, making the screws and the wood invisible. The above are three simple ways to make Roman blinds. You can make Roman blinds that can block the sun by doing it yourself at home, and it can also bring you a great sense of accomplishment. Just thinking about it makes you feel proud!