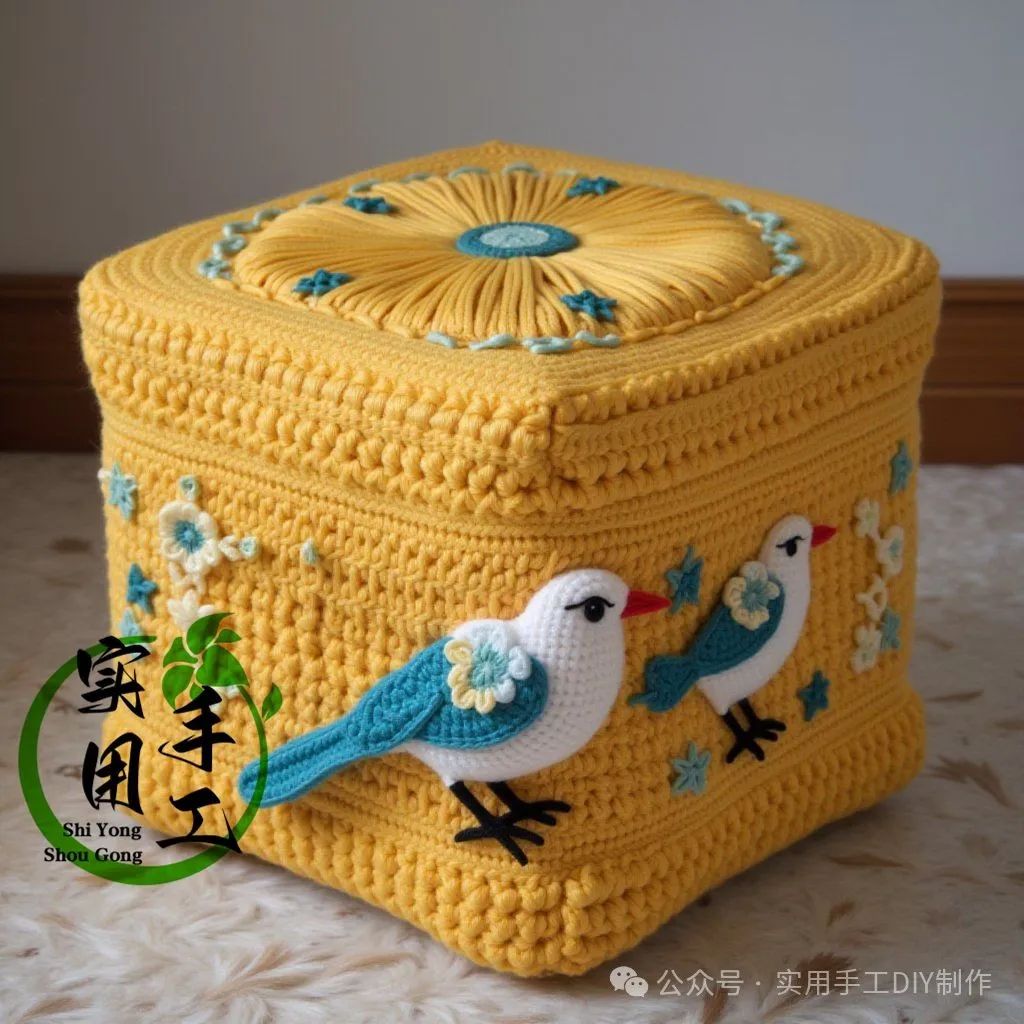
Creating a stool with a bird pattern sounds like a very interesting and challenging project! Although crafting a stool may require more time and skill, it can add a unique artistic touch to your home decor. Since stools typically bear weight, we must pay special attention to strength and stability. Below is a step-by-step guide to help you create a bird pattern stool that is both aesthetically pleasing and practical.
Materials needed: Crochet hook: Choose a crochet hook that suits your yarn (generally, 3.5mm to 4mm is suitable for most yarns).
Add Filling (Optional): If you desire a softer and more comfortable seating area, consider incorporating soft padding such as foam or cotton filling when crocheting the seat fabric. Ensure that the filling is not exposed during the final round of crocheting.
Crochet the Bird Pattern: Next, we will crochet the bird pattern and sew it onto the seat section. You can place the bird pattern in the center of the seat or on one side.
Body of the Bird: Start by choosing the main color for the bird (such as blue or gray) and begin with a small round. Crochet several rounds of single crochet (SC), gradually increasing the number of stitches until the desired bird body shape is formed. Start with 6-8 SC stitches and increase round by round until the diameter reaches 8-10 centimeters. Continue crocheting the height of the body while maintaining the round shape.
Bird’s Wings: Start with a color different from the body (such as yellow or orange) and crochet a small wing shape, which can be oval or triangular, and of moderate size. Make the other wing: create a symmetrical wing.
Bird’s Eyes: For the eyes, crochet two small circles with black yarn, approximately 6-8 stitches each. After forming the circles, add a highlight (a small light dot) using white or light-colored yarn.
Bird’s Beak and Tail: Use orange yarn to crochet a small triangle for the bird’s beak and sew it in the center of the bird’s head. For the tail, use the same color as the wings to crochet several thin tail feathers to form the tail.
Sew the Bird Pattern onto the Seat: Sew all the bird components (body, wings, eyes, beak, and tail) onto the crocheted seat fabric. You can adjust the position of the bird according to your preference, either off to one side or in the center. Sew the bird pattern using a sewing needle to attach the body, wings, tail, and eyes to the seat fabric, ensuring each part is secure.
Trim: After completing the pattern, trim any excess thread.
Install the Seat Section: Finally, attach the crocheted seat section to the stool base: Secure the seat to the stool base using strong glue, nails, or wood screws. Ensure that the seat is firmly attached to the wooden or metal frame of the stool and does not wobble.
Complete and Trim: Check the stability of the entire stool to ensure the seat is secure. Trim any loose threads and check the seat fabric and bird pattern to make sure no threads are left untrimmed.
Tips: You can use decorative items such as beads or sequins to embellish the bird’s eyes or wings to make it more vivid. For color coordination, choose the bird’s colors based on your home’s style or the season—bright colors for spring, warm tones for autumn, and cool shades for winter.
Hardness Issue: If you feel that the crocheted seat surface is not firm enough, you can consider adding a layer of cardboard or plastic board at the bottom.
Conclusion: Through this project, you will be able to make a practical and beautiful bird pattern stool! It not only has a personalized artistic sense but also adds a touch of color to your home.